We will explain Chuwi SurBook Mini Boot from USB guide which can work for Windows and Linux. So without wasting time lets discuss USB boot guide for your Chuwi SurBook Mini.
About Chuwi SurBook Mini
Chuwi SurBook Mini comes with a 10.8 inches IPS, LCD WUXGA display with a resolution of 1920 x 1280 Pixels.
It is powered by Quad Core 1.1GHz CPU with 6GB RAM and 64GB storage expandable upto 128GB via microSD.
The graphics are powered by Intel HD 500 Graphics.
Chuwi SurBook Mini has a Non-Removable Lithium-ion Polymer 8,000 mAh battery.
When it comes to the camera it has 5 Megapixel Rear Camera and 2 Megapixel Front camera.
It has network options including 802.11 WIFI, and Bluetooth 4.0.
Lastly, Chuwi SurBook Mini is 0.88cm thick and weights 686gms with Microsoft Windows 10 Home English Version.
It is a process of starting a Computer operating system from the USB drive.
Booting from USB enables to get booting information in a USB rather than using a hard disk or the CD drive.
All new operating systems support to boot from USB in Chuwi SurBook Mini.
Advantages of Booting from USB?
There are many advantages of Booting from USB over other booting options such as DVD and other which are discussed below,
No need to purchase any blank CD and you can fill your own stuff along with the ISO file.
USB Drives are reusable
Faster read and write than CD
Very convenient and portable
Disadvantages of Booting from USB
Booting from USB is depended on the Hardware such as BIOS, motherboard and flash drive model as it may be working with one computer and refuses to another.
CD has wider support and USB boot functionality is not available for may operating system.
After installing Rufus simply select the ISO file from the file manager and accept all settings when the popup window appears.
Select MBR partition scheme for BIOS or UEFI and If your laptop has UEFI bios then select the other two options.
For the Filesystem select NTFS option and select if your PC has UEFI bios then select FAT32.
The default Cluster size option should be selected.
Make sure all three options including Quick Format, Create a Bootable disk using and Create extended labels and icon files are selected.
Finally, start the process and this software will automatically format and create bootable USB flash drive.
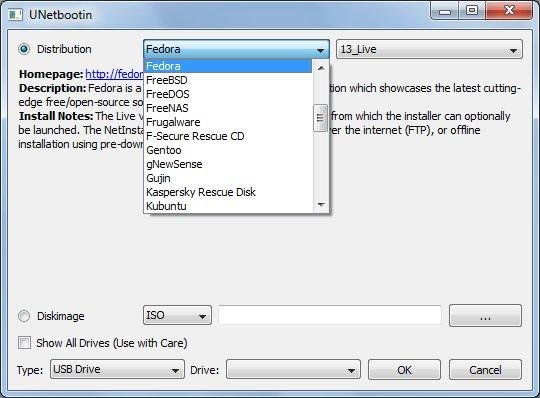
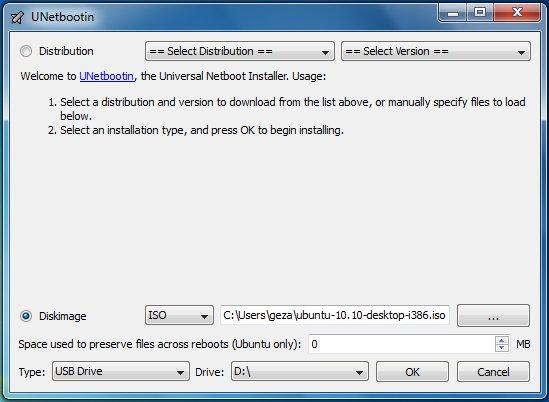
2. Chuwi SurBook Mini Boot from USB using Unetbootin
UNetbootin enables you to create a bootable USB drive for Live operating system for Ubuntu and other Linux distributions. To create a Bootable Live USB drive follow the instructions below,