Here is the complete guide to install Ubuntu on Lenovo Yoga 520. We will be installing the latest Ubuntu 18.04 LTS on your Laptop please follow this step-by-step guide.
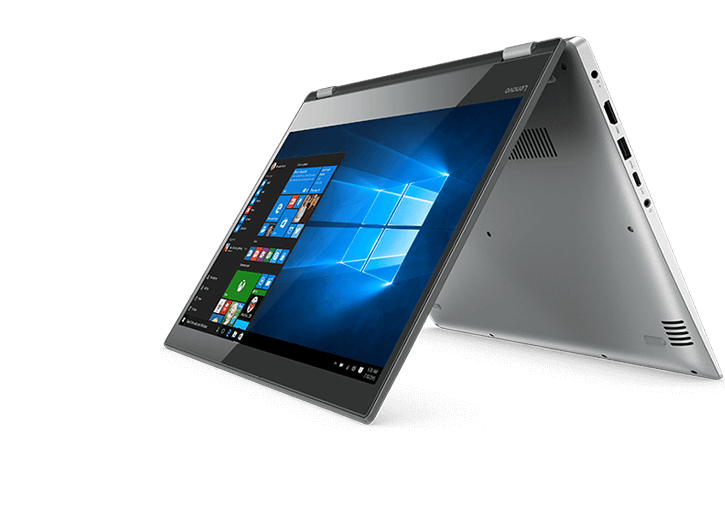
About Lenovo Yoga 520
Lenovo Yoga 520 comes with a 2.20GHz Intel Core i3-8130U processor with a 4GB DDR4 RAM. It is a beautiful 14-inch 2-in-1 laptop with extraordinary performance and long-lasting battery.
The durability of this laptop enables feasibility in converting in a tablet which makes a perfect angle of this device.
Furthermore, you receive Windows 10 pre-installed plus you get a home assistant Cortana.
With good performance, you also receive 10.4 hrs of battery life which will enable you to work the whole day with a single charge.
Ubuntu is a free and open-source Linux Debian operating system.
Also, Ubuntu offers three editions desktop, server, cloud, and Ubuntu core.
It provides new releases every 6 months while LTS occurs every 2 years.
Ubuntu is developed by Canonical which provides free security updates and support to its users.
Furthermore, for installing Ubuntu 18.04 LTS on your Lenovo Yoga 520 you meet minimum requirements such as 2GB RAM, Dual-Core Processor (2 GH) and 25 GB free space.
For any further assistance, help things started by Asking a Question
Advantages of installing Ubuntu
It is free of cost while the official Windows operating system is chargeable.
Ubuntu can be run without installing and can be used for testing purposes. You can simply run it live from your USB or DVD drive and it can be a portable OS.
Ubuntu is customizable while on Windows you can only customize some components.
It is more secure.
Ubuntu is good for developers. It provides Unix utilities combined with Piping and redirection which can blow any programmer’s mind. The Unix shell can be customized to make it easy to write the programs.
It can be updated without restarting.
The way Ubuntu has been created it is very difficult for a virus to survive so there is no need to install anti-virus software in Ubuntu.
Lastly, Ubuntu provides more resources.
instructions to install Ubuntu on Lenovo Yoga 520
Make sure you have the latest Ubuntu Operating system Downloaded from the official Site, if not then download it from the official website.
1. Create a Bootable Disk
The downloaded ISO file is to be burned into a USB/DVD or flash drive which will be used to boot the computer.
After installing Rufus simply select the Ubuntu ISO file from the file manager and accept all settings when the popup window appears.
Finally, start the process and this software will automatically format and create a bootable USB flash drive.
2. Change boot-order to boot from USB in Lenovo Yoga 520
Turn your Lenovo Yoga off
Now connect the bootable USB stick to the port.
Hold the volume-down button and Press and release the power button.
Release the volume down button as soon as the Lenovo logo appears.
Now go to the Boot configuration option and move USB to the top of the list.
Finally, Reboot your Laptop
3. Boot from the Drive USB/DVD
After successfully booting your USB stick you need to turn off your Lenovo Yoga 520 to install Ubuntu on it.
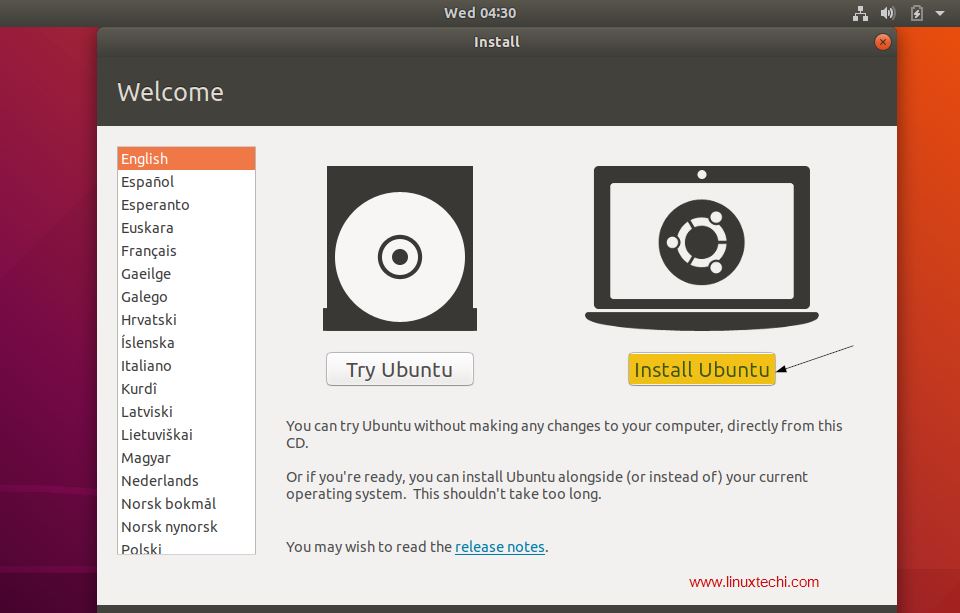
Insert the USB in port and once you will restart your laptop the screen presenting “Try Ubuntu” and “Install Ubuntu” will be shown to you.
.
You can either try Ubuntu or install Ubuntu, Although the Try option is for testing the operating system this process will also take some time.
So if you are continuing with install Ubuntu then read the further guide.
4. Installing Ubuntu 18.04
There are many steps in the process of installing Ubuntu on your Lenovo Yoga 520 which will be provided step-by-step below,
1. Choosing Keyboard
Choose a keyboard layout and click Continue and by default English option is selected.
Now you have to choose a type of installation as there are two types – Normal and Minimal installation. In our case, we have preferred the normal installation.
Downloading updates while installing must be turned off for a faster installation.
install third-party software for graphics and Wi-Fi hardware, MP3 and additional media formats should be selected only is internet connection is available while installation.
Finally, click continue to proceed.
2. Selecting the installation type
Installation options,
Erase the whole disk and install the Ubuntu: It is the easiest way to install Ubuntu on your Lenovo Yoga 520 A fresh copy will be installed on your Laptop by erasing all the stored data on your PC.
For security Encrypting new Ubuntu installation for security: Not to worry about this option as this option will ensure the security of your drives.
Using LVM: LVM or Logical Volume Management
Something Else: Use this option if you want to install Ubuntu along with existing Operating system such as Windows 10. In addition, only select this option if you are familiar with such technical task.
3. Creating Partitions for Something Else Option
To create the partition on your own you can click “New Partition Table”
Click on Continue and create a /boot partition of size 1.5GB. Select free space and click on the “+” symbol for creating a new partition.
Now click on OK
Let’s create the /home partition of size more than 18GB.
Next, create partitions / of 6GB and /var of 4GB by using the process we have discussed with you.
Lastly, Create the swap area partition of 2GB.
Check that all the partitions are made correctly or not. Once you have created the partitions successfully you can proceed to the further steps by clicking Install Now.
5. Selecting Time Zone
Choose the desired time zone and click on continue
6. Providing user credentials
Give your information to the page prompted to you. The page will ask your name, computer name, username, and password. Finally, click on continue to begin the process of installing Ubuntu 18.04 LTS on your Lenovo Yoga 520.
7. Start installation
Installation may take around 5 to 10 minutes on your Lenovo Laptop which may depend on the speed of the Laptop.
8. Restart and Login
Restart your computer and enter the login details you have provided previously in User credentials.


")


![Lenovo Yoga 520 Screen Flickering Problem [Solved]](https://www.infofuge.com/wp-content/uploads/2019/08/71zKT7i0jfL._SL1500_-150x150.jpg "Lenovo Yoga 520 Screen Flickering Problem [Solved]")