We will explain Acer Aspire ES1-533 Boot from the USB guide which can work for Windows and Linux. So without wasting time lets discuss USB boot guide for your Acer Aspire ES1-533.
What is Boot from USB?
It is a process of starting a Computer operating system from the USB drive.
Booting from USB enables us to get booting information in a USB rather than using a hard disk or the CD drive.
All new operating systems support to boot from USB in Acer Aspire ES1-533.
About Acer Aspire ES1-533
Acer Aspire ES1-533 comes with a 15.6-inch display with a resolution of 1366 x 768 pixels.
It is powered by Intel Celeron Dual-Core Processor with storage of 500 GB HDD and 4 GB DDR3 RAM.
The graphics are powered by Integrated Intel HD 500 Graphics.
Acer Aspire ES1-533 has a 3 cell battery with a battery life of 6.5 Hrs.
There are many advantages of Booting from USB over other booting options such as DVD and other which are discussed below,
No need to purchase any blank CD and you can fill your own stuff along with the ISO file.
USB Drives are reusable
Faster read and write than CD
Very convenient and portable
Disadvantages of Booting from USB
Booting from USB is depended on the Hardware such as BIOS, motherboard and flash drive model as it may be working with one computer and refuses to another.
CD has wider support and USB boot functionality is not available for may operating systems.
Acer Aspire ES1-533 Boot From USB Instructions
1. Create Bootable USB using Rufus for Acer Aspire ES1-533
After installing Rufus simply select the ISO file from the file manager and accept all settings when the popup window appears.
Select the MBR partition scheme for BIOS or UEFI and If your laptop has UEFI bios then select the other two options.
For the Filesystem select NTFS option and select if your PC has UEFI bios then select FAT32.
The default Cluster size option should be selected.
Make sure all three options including Quick Format, Create a Bootable disk using and Create extended labels and icon files are selected.
Finally, start the process and this software will automatically format and create a bootable USB flash drive.
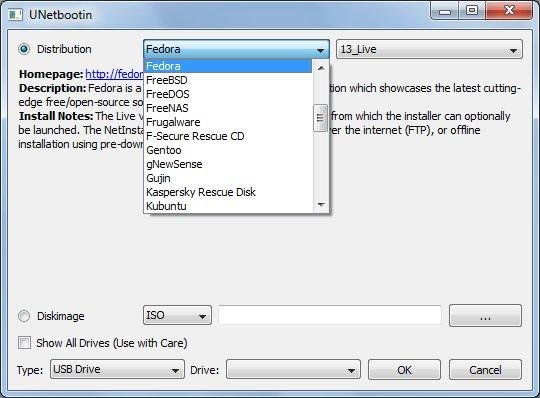
2. Acer Aspire ES1-533 create Bootable USB using Unetbootin
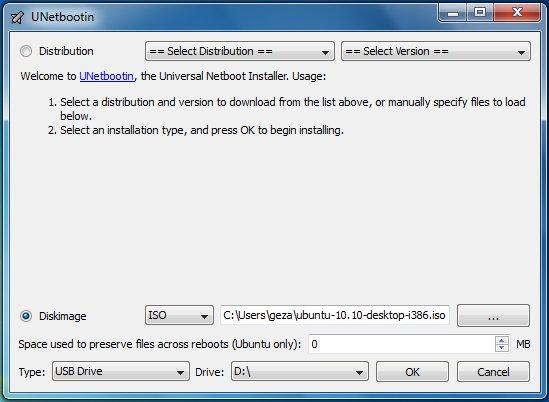
UNetbootin enables you to create a bootable USB drive for the Live operating system for Ubuntu and other Linux distributions. To create a Bootable Live USB drive follow the instructions below,
Using the Universal USB Installer is the easiest way to create a live Linux USB or bootable USB.
All you need to do is selecting the ISO file, your Flash Drive and, finally, Click Install.
The process will automatically start and you will receive a ready bootable USB Flash Drive
Change boot-order to boot from USB in Acer Aspire ES1-533
To change the boot order in Acer Aspire ES1-533.
First of all, turn off your Laptop or restart it
Then to enter into the UEFI BIOS Press F2 key as soon as Acer Logo appears. In case, you have not entered into BIOS restart your Laptop and retry with the F2 key or other key provided by Manufacturer
The Secure Boot should be Disabled and CSM + UEFI selected in OS Mode Selection.
Under Boot options, change Boot Options and finally change the boot order to the USB